

The chapter Tasks contains the following subchapters:
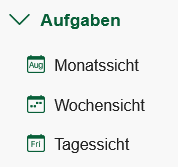
Access the task calendar by clicking on one of the views (monthly/weekly/daily view) in the main menu at the top left. New tasks can be created here and the all tasks to be completed can be viewed, rescheduled, changed or marked as completed. Maintaining the task calendar well can be a success factor! Accessed on a smartphone in the field or in the propagation greenhouse, all employees always have the assigned tasks with all the information with them, can look up cultivation details and notes, log them and record the task time. Once the work is done, they can mark the task as “completed”.
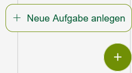
Click (bottom right) on +Create new task to create a new task. In the monthly and weekly view, you can also simply click on a free space in a day view to create a new task.
![]() The search field and the filter (click on the funnel symbol to open the task filter) allow you to filter the tasks in the calendar.
The search field and the filter (click on the funnel symbol to open the task filter) allow you to filter the tasks in the calendar.
Tasks from the crop: The tasks sowing or direct sowing and planting are automatically added to each planned set by the program when the set is created, as are all tasks transferred from the crop via task templates.
Tasks planned on the “Tasks” tab of the set or field are also transferred to the task calendar.
Tasks that are not assigned to the block or field can be created directly in the task calendar.
Selection of the displayed year: For the task calendar views, use the year switcher from the navigation bar at the top.
Views (month, weeks, days) The task calendar contains a clear monthly view and a more detailed weekly or daily view. In the weekly view, a calendar export of the daily and weekly overview can be created for printing.
6.1 Month View
The month view shows the month displayed in the month switcher at the top left.

The months can be changed by clicking on the arrows as with the year changeover and also by clicking on the month name and selecting a different month from the drop-down menu.
The table contains the calendar weeks (rows) and days (columns).
 Tasks in the monthly view are outlined in color. Tasks assigned to a person have the name in brackets after the task name. If several people have been assigned to a task, the first person selected always appears in brackets.
Serial tasks: A file symbol on the left identifies the task as part of a series.
Completed tasks: Tasks marked as completed are displayed in a paler color and marked with a green tick on the left.
A day field can only display a certain number of tasks in the monthly view. To see the remaining tasks, click on “…more…” below the tasks, which opens the day view with all tasks for the day.
Tasks can be moved in the monthly view using drag & drop.
To create a new task, click on a free space in the table field of the desired day.
6.2 Week View
![]()
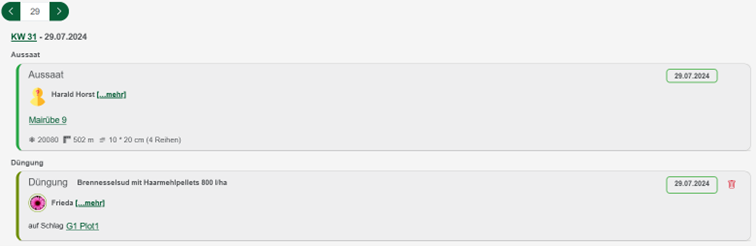
You can access the week view via the main menu or by clicking on the calendar week (in the month view on the far left in each week line or from the day view at the top left). All tasks for each day of the selected calendar week are displayed here one below the other. You can switch back and forth between the weeks using the week selection (top left).

Calendar export: Click on “Wochenexport.xlsx” to create an Excel file of the calendar week view. This can be printed from Excel. All information relating to the task is displayed in the export file: Name of the task, employee*, number of plants, bed meters, notes, and much more.
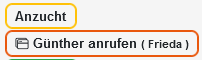
Tasks that are not assigned to a record (e.g. “Bake cookies” or “Call Günther”) show the name of the task and, if applicable, a responsible employee. If there are several employees, the main person responsible is always displayed with an avatar; other assigned employees can also be displayed by clicking on […more].
If culture information is also displayed, the task in the weekly view is linked to the sentence or key phrase shown in green.
By clicking on the sentence or beat name, you can call up the sidebar with the sentence details or switch directly to the beat view.
Individual tasks can be deleted in the weekly view by clicking on the trash can icon. System tasks such as planting, sowing and harvesting are excluded from this.
6.3 Daily View
You can call up the daily view from the main menu or by clicking on the desired daily date field in the weekday line of the monthly or weekly view.
You can use the selection field at the top left to switch the days forwards or backwards. All tasks of the selected day are displayed with all details and notes.
You can return to the weekly view by clicking on the week number at the top left.
You can also create new tasks in the daily view (click on the “plus” at the bottom right) or filter existing tasks (click on the funnel symbol) at the top.
To change a task or mark it as completed, click on an empty space in the task to open the editing window in the sidebar. Then edit the task or click on “Complete”. Delete a task with the “trash can” symbol on the right-hand side of the task line.
6.4 Tasks
Task details: Click on a task to display the associated task details in the sidebar. You can complete, delete or copy a task using the options at the top right. The green X closes the sidebar. The system tasks of cultivation, sowing and planting cannot be deleted, they are deleted with the corresponding record!
![]() If a task is marked as “completed”, it can no longer be edited or moved. To do this, “Reset status” must be clicked to remove the completed status.
If a task is marked as “completed”, it can no longer be edited or moved. To do this, “Reset status” must be clicked to remove the completed status.
Edit new task: Click (bottom right) on +create new task to create a new task. In the monthly and weekly view, you can also simply click on a free space in the table field of the desired day to create a new task. The sidebar with the creation window for a new task is now open. Then assign the date, a color and, if necessary, assign one or more employees. You can enter a time specified for the task or leave out the working time field so that a time is recorded by the persons carrying out the task.
Click in the notes field to create a note on the task.
You can use the “Set”, “Field” and “Bed” selection fields to assign a set or field with individual beds to the task.
Complete the task: Once a person has completed their task, the task can be marked as completed directly via the mobile app or on the desktop.
To do this, open the task, enter the working time and click the “Done” button (at the top). You can recognize tasks marked as “completed” in the overview by a green tick.
You can revoke the completed status by clicking on “Reset status” (in the editing window of a task marked as completed).
Please note: For documentation reasons, tasks with a completed status can no longer be changed and can no longer be moved using drag and drop.
![]() Create a recurring task: To plan a task multiple times with a constant interval, activate the “Serial task” checkbox in the task editing window and set a daily or weekly interval and an end date.
Create a recurring task: To plan a task multiple times with a constant interval, activate the “Serial task” checkbox in the task editing window and set a daily or weekly interval and an end date.
A scheduled recurring task can be recognized by the recurring symbol to the left of the task name.
Filter task calendar: To keep an overview in the task calendar, the tasks created can be filtered. Show only certain tasks, only open or already completed tasks, only/no cultivation dates or filter by type of task (e.g. only fertilization). You can also display only the tasks assigned to you personally or those of an employee.
When the filter is active, the filter icon appears in light green. To restore the standard view, click on “Reset filter” in the filter window.